Table of Contents
Before proceeding with this mini-guide, it is assumed that you have already set up and have a functional Virtual Host. If you haven't done so, please consult the Virtual Host or Quick Start guides for detailed information.
To upload your website content, there are several options available to connect to the server. Two commonly used methods are SFTP and FTPS.
For SFTP, follow these steps to obtain the necessary connection information:
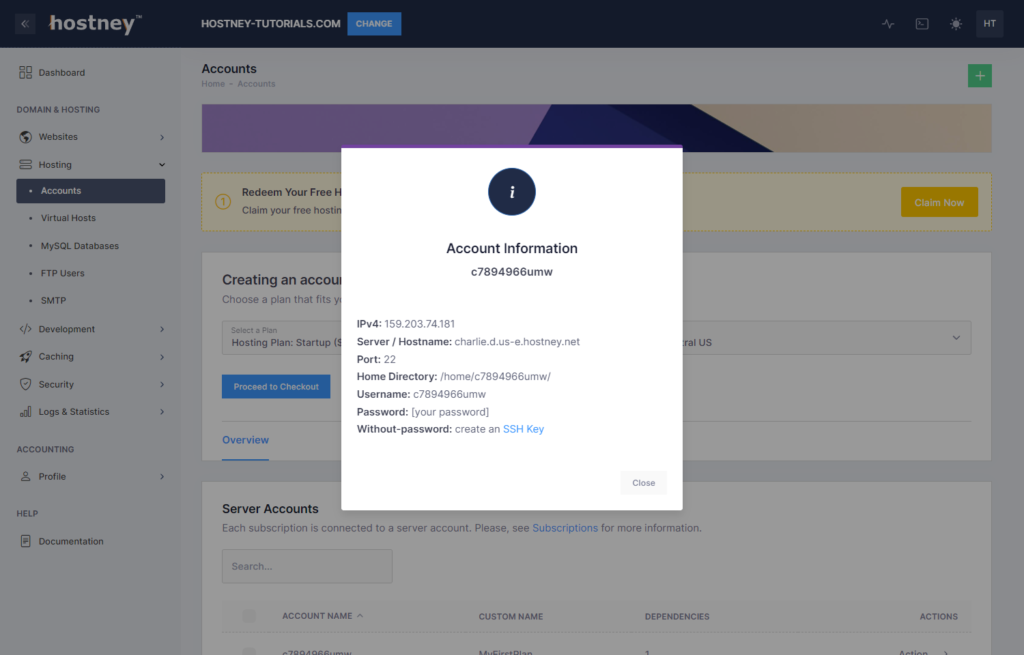
- Go to the "Hosting" section of your website's control panel.
- Click on "Accounts" to access your hosting account details.
- Locate your hosting account and click on "Information" under the "Actions" column.
- A modal window will appear, providing the basic information required for the connection.
- If you don't know your password, you can reset it or set up passwordless authentication using an SSH Key. Refer to the guide on resetting your password or the guide on SSH Keys.
Once you have the necessary prerequisites for the connection, you'll need to download an SCP client to establish the connection. If you're using a Windows-based operating system, the recommended option is to download and install WinSCP. Visit winscp.net to download the latest version of WinSCP.
Setting Up WinSCP
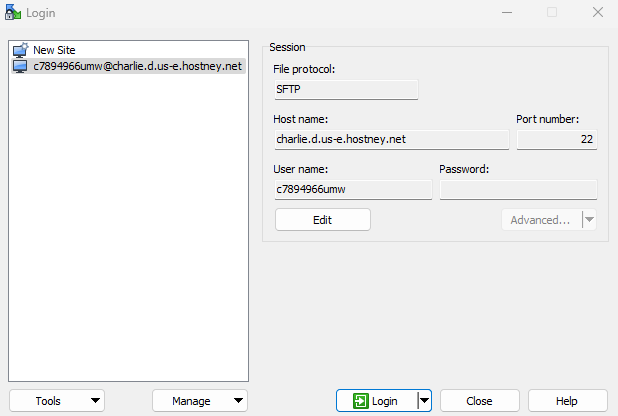
Start WinSCP and click on the "New Session" tab. Select the "SFTP" file protocol, enter the hostname, port number, and user name in their respective fields, and click on "Save".
You will be prompted with a "Save session as site" window, where you may specify how you want to save your credentials. Once decided, click "OK".
Select the recently saved connection, click "Edit" then go to "Advanced".
Look for the "SSH" > "Authentication" section. Select the downloaded private key and save your configuration.
Click "Login" to connect to the server.
It is safe to ignore certificate-related warnings.
Setting Up FileZilla (FTPs)
Sometimes, you might find it necessary to utilize FTP connections for managing your data.
In this brief guide, we'll demonstrate how to set up an FTP connection using FileZilla, which you can download for free from filezilla-project.org.
Before proceeding, ensure you have created an FTP user. For comprehensive instructions, please refer to our FTP Users guide.
Now, follow these steps to acquire the FTP connection information:
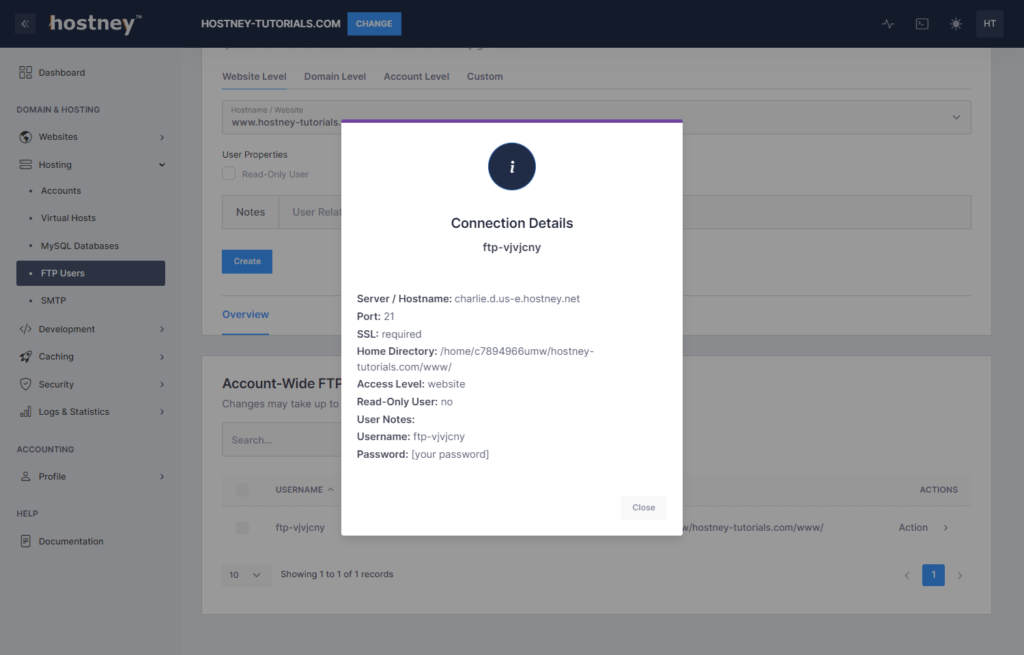
- Go to "Hosting" > "FTP Users" and find your FTP User.
- Hover over "Action" and select "Information."
Once you have FileZilla installed, proceed with the following:
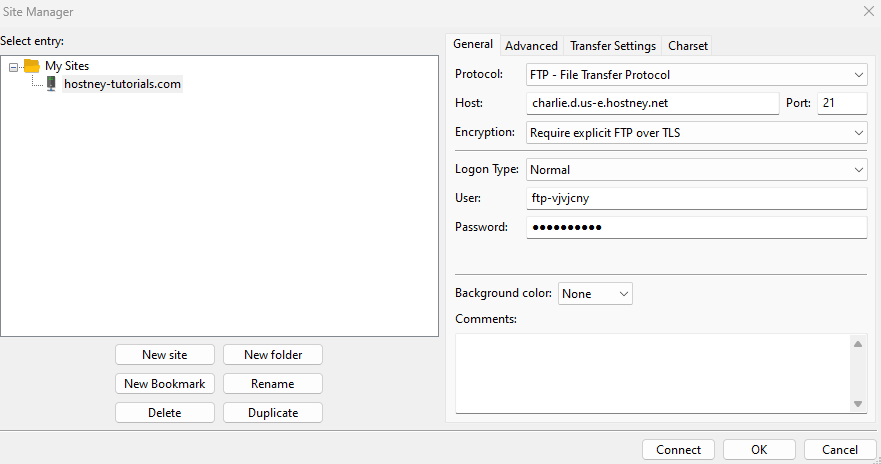
- Navigate to "File" > "Site Manager" and click "New Site."
- Assign a name to the site, then select the FTP Protocol.
- Fill in the "Host," "Port," "User," and "Password" fields with your specific connection details. Also, change the "Encryption" type to "Require explicit FTP over TLS."
- Finally, click "Connect" to log in and establish the FTP connection.