
Table of Contents
Welcome to our Quick Start section, designed specifically for those who prefer to dive straight into web hosting without the fuss. If you're short on time and eager to get your website up and running, you've come to the right place. In just a few sentences, we'll guide you through the essential steps to unleash the power of our web hosting services without any technical jargon or delays. Let's get started on your hosting journey, hassle-free and at your own pace!
Create an Account
To create an account with us, simply visit our website at my.hostney.com. Once there, look for the "Sign Up" option and click on it. You'll be presented with a straightforward registration form where you can provide your necessary information such as your email address, and password.
If you prefer a quicker signup process, we also offer Google and GitHub signup options. Just click on the respective buttons, and you'll be redirected to authorize the connection between your existing Google or GitHub account and our platform.
Confirm Your Email Address
If you choose to sign up without using Google or GitHub, after completing the registration form on our website at my.hostney.com, we will send a confirmation email to the address you provided during the signup process.
To verify your email address and activate your account, simply open the email and click on the verification link provided. This step is important to ensure the security of your account and to prevent unauthorized access.
Once you've confirmed your email address, you'll be all set to start using our web hosting services and unleash the full potential of your website. If you don't see the confirmation email in your inbox, please remember to check your spam or junk folders.
Set Up Multifactor Authentication
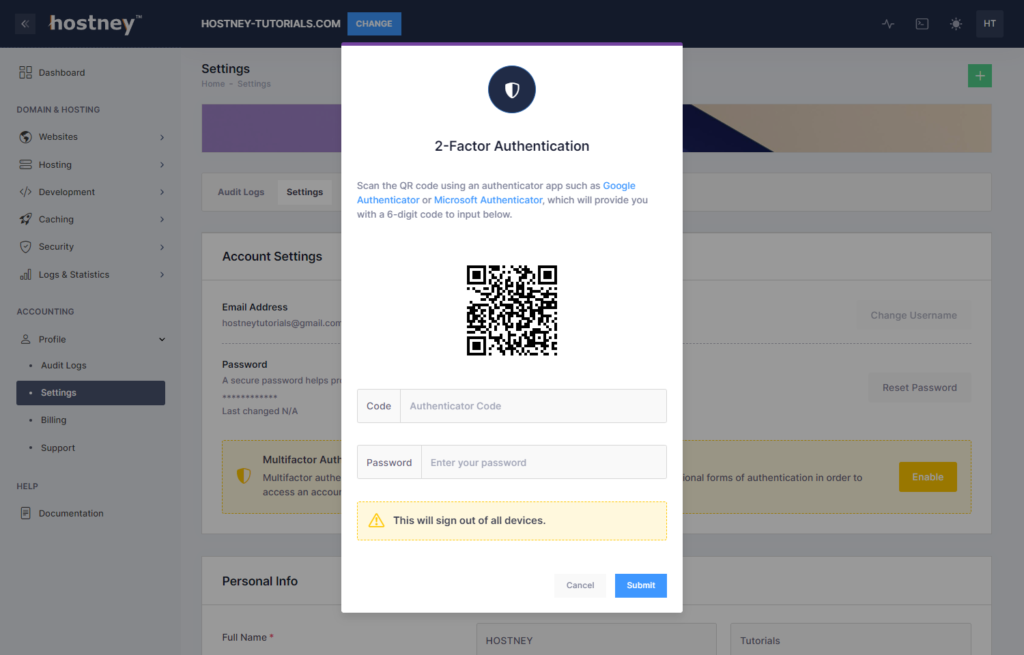
To ensure the utmost security of your hosting account, we highly recommend setting up multifactor authentication (MFA). MFA adds an extra layer of protection to prevent unauthorized access and safeguard your sensitive data. MFA can be enabled for regular accounts.
To enable MFA, go to the "Profile" section and click on "Settings", look for the Multifactor Authentication option. Follow the instructions to set it up. You will need to link your account to a mobile app (such as Google Authenticator or Microsoft Authenticator) that generates temporary codes for login verification.
Emphasizing the importance of MFA cannot be stressed enough. By enabling this additional security measure, you significantly reduce the risk of unauthorized access to your account. Nobody wants to deal with compromised accounts.
Claim Your Free Web Hosting Trial
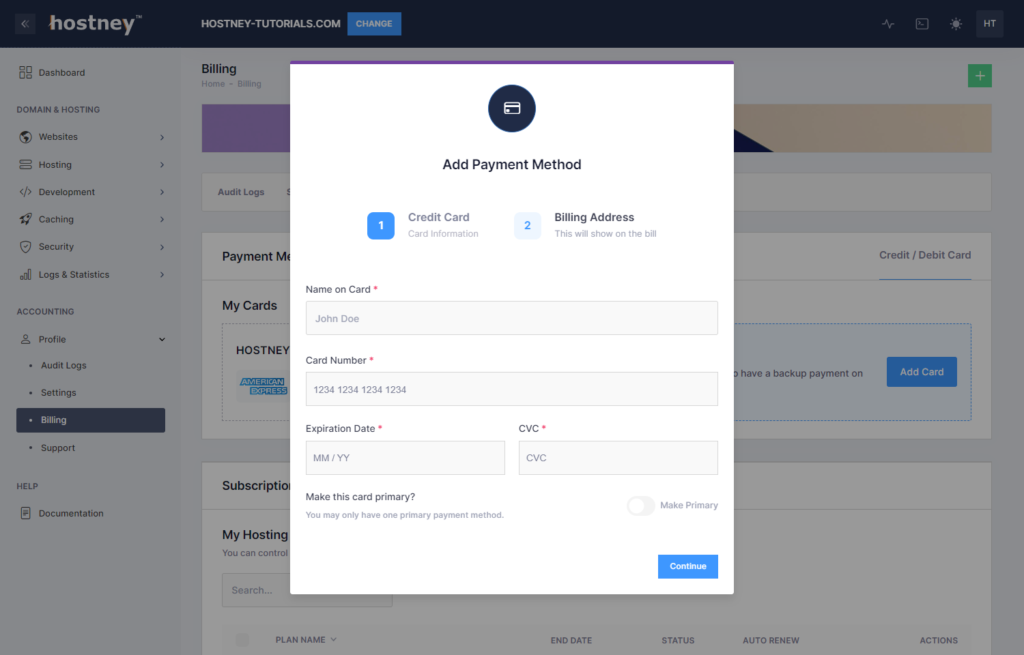
After successfully creating a Hostney account and confirming your email address, the next step is to add a credit card to our system. To do this, navigate to the "Profile" section and click on "Billing". Look for the "Payment Methods" section and click on the "Add Card" button.
By adding a payment method to your account, you not only enable easy and convenient billing but also qualify for a trial hosting plan for 30 days. This means you can take advantage of our hosting services without any initial cost.
It's a great opportunity to explore our features and get your website up and running without any financial commitment.
Your card will not be charged unless you choose to upgrade from the trial plan or make additional purchases for other services.
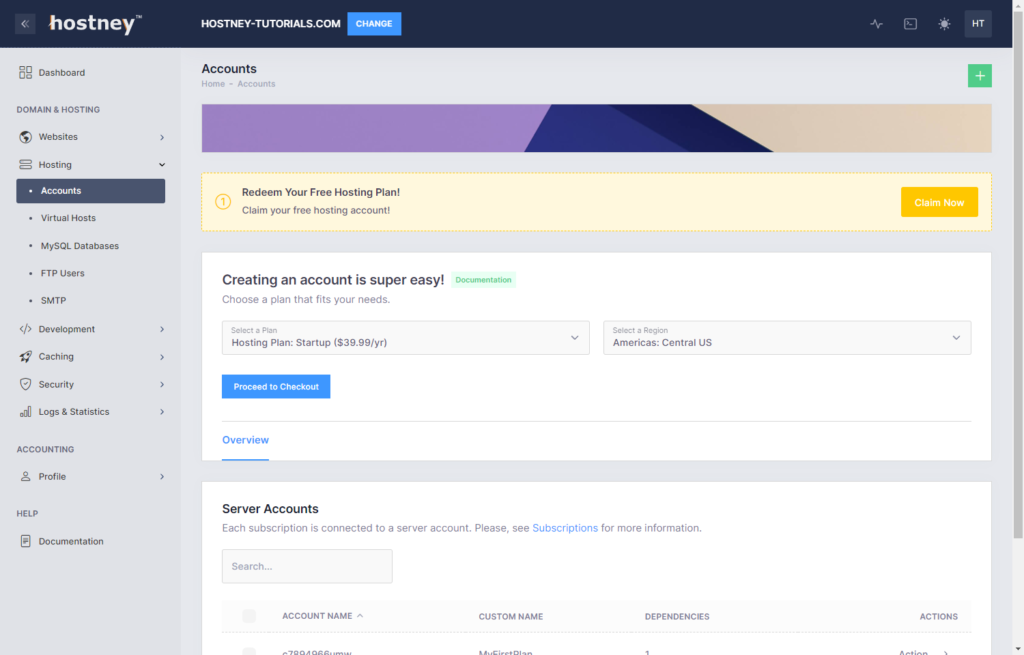
Once you have your credit card on file, go to "Accounts" and claim your trial hosting.
Add Your First Domain Name
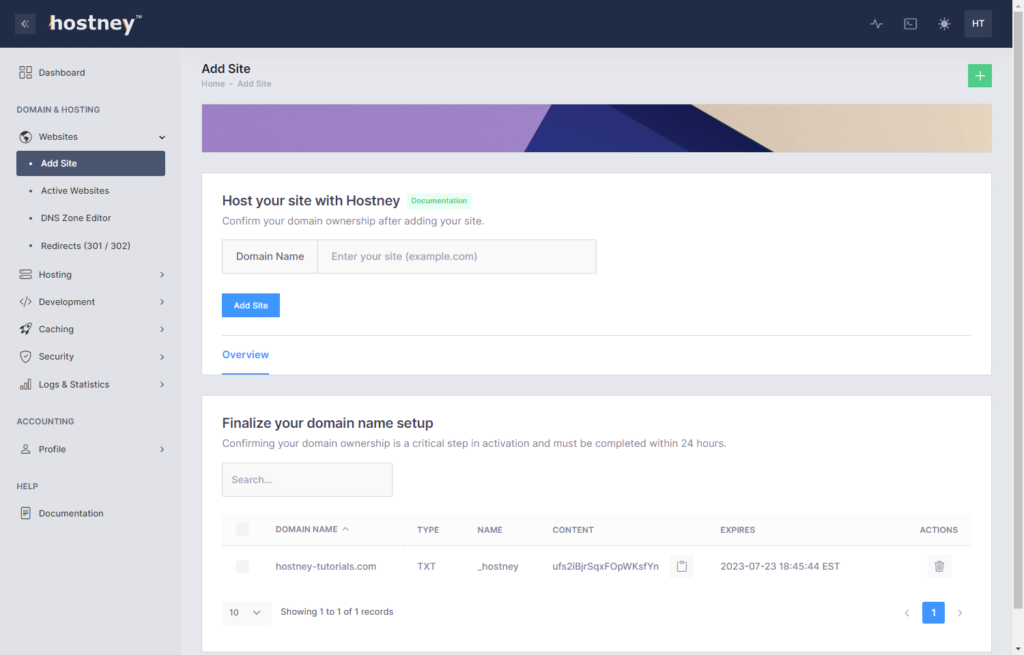
Once you've set up your account and payment method, the next step is to add a domain name to our system. To do this, navigate to the "Websites" section and click on "Add Site."
To complete the process of confirming domain ownership, follow the provided guidelines to include the designated TXT record in your domain's DNS configuration. This crucial step affirms your administrative control over the domain, allowing you to implement essential modifications.
To initiate this procedure, access the control panel of your domain name registrar or your current DNS provider. Navigate to the section designated for DNS settings and proceed to create a new TXT record.
In the "name" field, input _hostney.[yourdomain.com]. In the corresponding "content" field, input the value that has been supplied to you through your Hostney Control Panel. By setting up this configuration, you will establish the necessary parameters.
Upon the successful addition of the TXT record, our system will proceed to validate the ownership and link the domain to your Hostney account. An email notification will be sent to you once the system successfully confirms your domain name ownership.
Alternatively, to verify your domain ownership, you can change your domain's nameservers to Hostney's nameservers. Further instructions and details on how to change nameservers will be discussed later in this document.
Attach Your Domain to Your Hosting Plan
Once you have confirmed your domain name ownership, the next step is to attach the domain to your hosting plan. To do this, follow these simple steps:
- Navigate to the "Websites" section and click on "Active Websites."
- Locate the domain you want to attach to the hosting plan and click on the "Set up" button.
- A modal window will appear with options to configure the domain settings. In the modal, select the desired hosting plan from the available options.
- Once you have chosen the hosting plan that suits your needs, click on the "Attach" button.
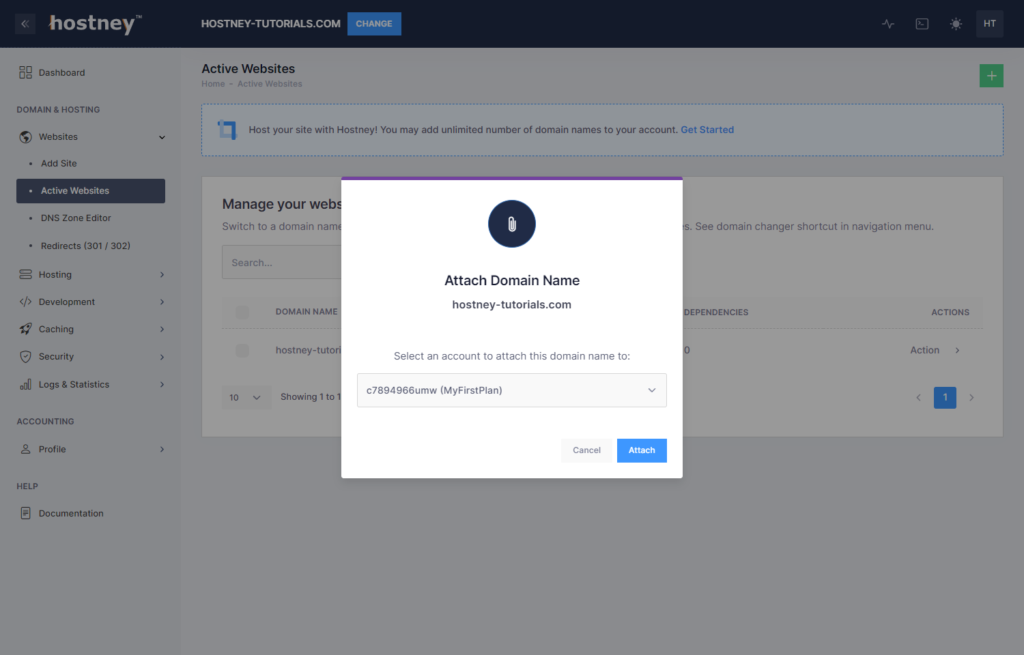
By attaching the domain to your chosen hosting plan, you ensure that your website is associated with the appropriate resources and configuration.
If you have multiple domains or hosting plans, you can repeat this process for each domain individually, attaching them to the respective hosting plans.
Create Your Virtual Host
To set up the "www.example.com" virtual host for your website, please follow these steps:
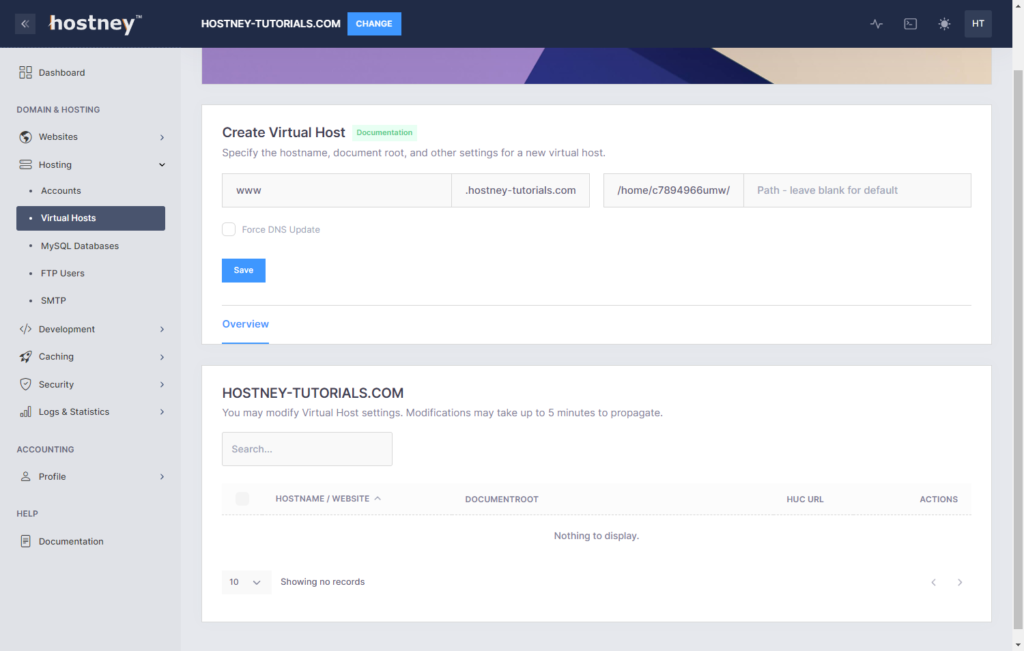
- Navigate to the "Hosting" section and click on "Virtual Hosts."
- Under the "Create Virtual Host" section, enter "www" in the hostname field.
- Select the desired PHP version from the available options.
- Click on the "Save" button to create the virtual host.
By following these steps, you will set up the "www.example.com" virtual host, which will enable visitors to access your website using the "www" prefix.
It's important to note that creating the "www" virtual host will also automatically generate a non-www version of your site. This ensures that your website is accessible both with and without the "www" prefix, providing a seamless experience for your visitors.
Please note that our system heavily depends on DNS services. You will need to manually point your domain's www and root (@/apex) records to your hosting plan's IP address or change your nameserver settings at your registrar to Hostney's.
If you want to use a 3rd party DNS provider, you can do so, in this case please look up your hosting plan's IP address and point your DNS to your new web server:
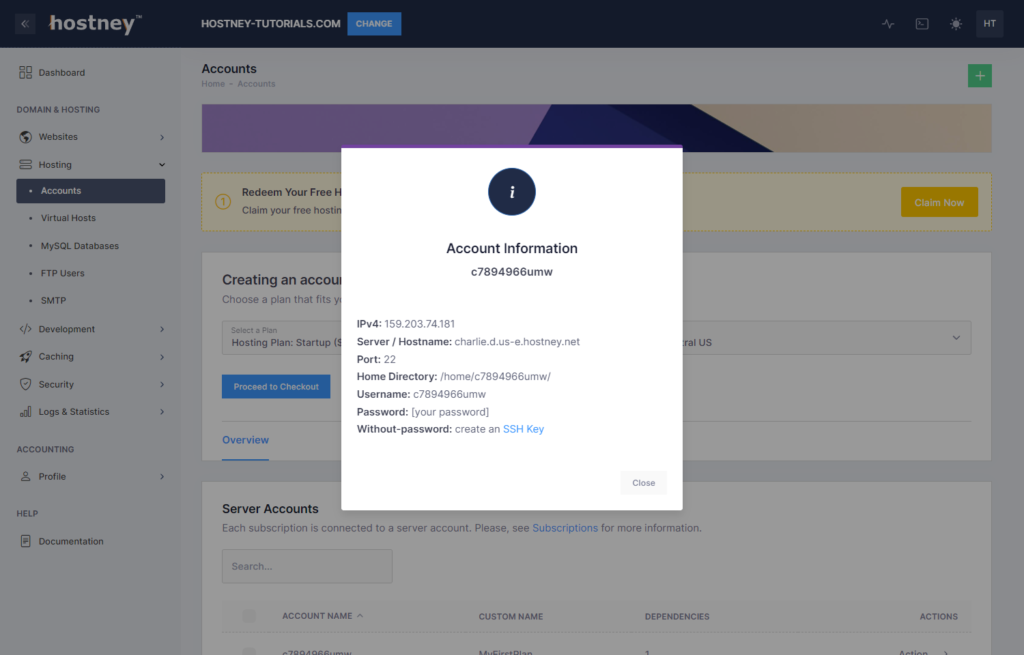
- Navigate to the "Hosting" section and click on "Accounts."
- Locate the respective account and look for the "Information" option under "Actions."
It is recommended to plan ahead and consider the necessity of the change. In preparation, adjust the TTL (Time To Live) for the specific records to the lowest possible value. Some providers allow TTL settings as low as 1 second. By doing so, it is advisable to delay the cutover by at least the same duration as the TTL previously set. This approach ensures a smoother and faster transition.
Once the records are updated to point to the correct IP address, our system will automatically generate a free SSL certificate for your website.
Please note that DNS propagation may take some time, typically ranging from a few minutes to several hours. During this period, your website might experience intermittent accessibility. However, rest assured that once the propagation is complete, your domain will be fully functional with Hostney's hosting environment.
Change Your Nameservers (Optional)
To fully leverage the potential of our services, we highly recommend changing your domain's nameservers to Hostney's DNS servers. While this step is optional, it ensures a smoother experience and access to all our hosting features.
Before changing the nameservers, it is important to migrate any existing DNS records to avoid interruptions in your website's functionality.
Hostney Nameservers:
ns1.hostney.net [159.203.72.97 / 2604:a880:800:10::7dc:e001]
ns2.hostney.net [64.227.109.178 / 2604:a880:4:1d0::85:1000]
At your domain registrar's settings or DNS management panel, locate the option to edit the nameservers for your domain. Replace the existing nameservers with the ones provided in this document.
By updating the nameservers, you ensure that your domain resolves to the correct DNS infrastructure and seamlessly integrates with our hosting services.
Should you encounter any issues or require assistance, our support team is ready to help you along the way.
Upload Your Website Content
To upload your content, you have a couple of options: setting up an FTP user or connecting via SSH/SCP. Please, see Upload Your Content for more information.
OR, Deploy WordPress!
Check out our Manage WordPress guide for more information.
Thank you so much!