
Table of Contents
Introduction
In this comprehensive guide, we will explore the world of WordPress SMTP plugins and provide step-by-step instructions, complete with examples, to set them up effectively.
WordPress is a powerful platform for creating and managing websites, but when it comes to sending emails, it often relies on the default PHP mail function, which can be unreliable. To ensure your emails are delivered consistently and securely, it's crucial to configure SMTP (Simple Mail Transfer Protocol) settings.
1. Understanding the Importance of WordPress SMTP
What is SMTP?
SMTP, or Simple Mail Transfer Protocol, is a communication protocol used for sending and receiving email messages over the Internet. In the context of WordPress, SMTP is crucial because it ensures that emails generated by your website, such as contact form submissions, user registration emails, and password reset requests, are reliably delivered to their intended recipients.
Why do you need SMTP for your WordPress website?
The default email-sending mechanism in WordPress relies on the PHP mail() function. While this function is simple to set up, it has limitations and can lead to emails being marked as spam or not delivered at all. SMTP, on the other hand, offers several advantages:
- Reliability: SMTP is a standardized and robust protocol designed for email delivery, reducing the chances of emails being lost or marked as spam.
- Authentication: SMTP allows you to authenticate your email sending with your email provider, proving that you have the authority to send emails on behalf of your domain.
- Improved Deliverability: SMTP lets you configure important email authentication records like SPF, DKIM, and DMARC to enhance email deliverability.
Common email delivery issues with the default PHP mail function
The default PHP mail() function lacks the authentication and reliability features provided by SMTP. As a result, emails sent from your WordPress website may encounter several common issues, such as:
- Emails going to spam: Without proper authentication and headers, email providers may categorize your emails as spam.
- Emails not delivered: Some email servers may refuse to accept emails sent via the
mail()function due to lack of proper authentication. - No tracking or logging: The
mail()function does not provide detailed logs, making it difficult to diagnose email delivery issues.
To overcome these challenges, it's essential to set up SMTP for your WordPress website.
2. Choosing the Right WordPress SMTP Plugin
Overview of popular WordPress SMTP plugins
There are several SMTP plugins available for WordPress, each with its own set of features and settings. Some of the popular ones include:
WP Mail SMTP
WP Mail SMTP is a widely-used plugin known for its simplicity and reliability. It allows you to configure various SMTP providers and easily test your email settings.
Easy WP SMTP
Easy WP SMTP is another user-friendly plugin that integrates seamlessly with WordPress. It offers a straightforward setup process and supports multiple SMTP providers.
Post SMTP
Post SMTP, formerly known as Postman SMTP, provides advanced email configuration options and robust debugging tools. It's suitable for users who require in-depth control over their SMTP settings.
Factors to consider when selecting a WordPress SMTP plugin
When choosing a WordPress SMTP plugin for your website, consider the following factors:
Ease of use
Select a plugin that aligns with your technical proficiency. If you're new to SMTP configuration, a user-friendly option like WP Mail SMTP or Easy WP SMTP may be ideal.
Compatibility
Ensure that the plugin you choose is compatible with your WordPress version and other plugins you have installed. Compatibility issues can lead to conflicts and errors.
Features
Evaluate the features offered by the plugin. Look for support for multiple SMTP providers, email logging, and testing capabilities.
Support and updates
Check if the plugin is actively maintained and has a support system in place. Regular updates are essential for security and functionality.
3. Configuring WordPress SMTP Settings (Using WP Mail SMTP as an Example)
In this section, we'll provide a detailed step-by-step guide on how to configure WordPress SMTP settings using the WP Mail SMTP plugin as an example. Here's a more in-depth look at the configuration process:
Setting up an SMTP provider
- Choose an SMTP provider: Select a reputable SMTP service provider such as Gmail, SendGrid, SMTP.com or SMTP2GO. You'll need an account with your chosen provider.
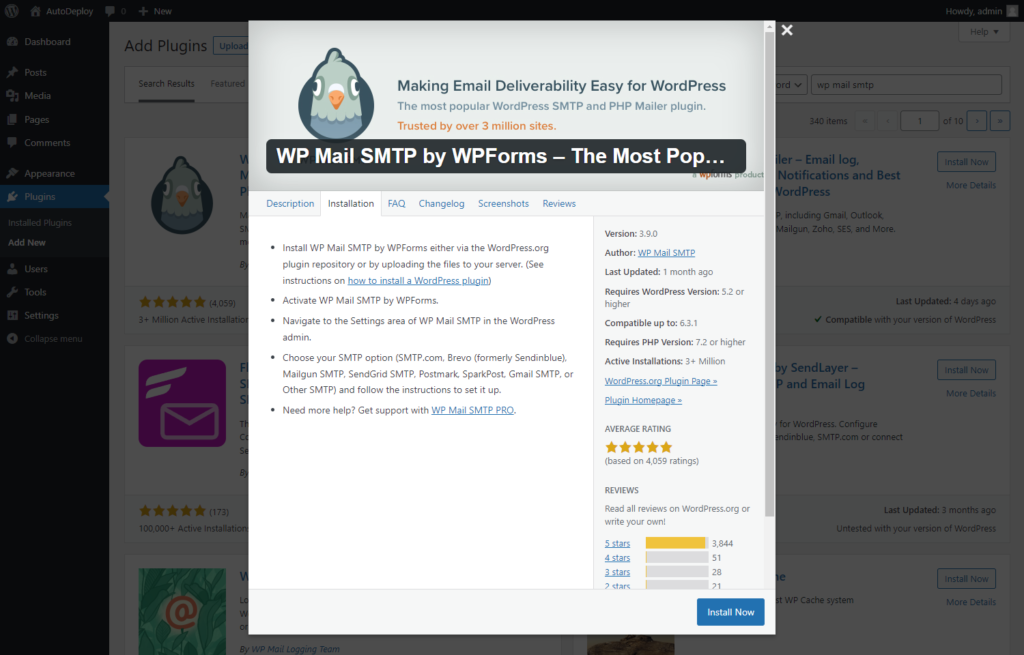
- Install and activate the WP Mail SMTP plugin: Go to your WordPress dashboard, navigate to "Plugins," and click "Add New." Search for "WP Mail SMTP" and install it. Activate the plugin.
- Access the plugin settings: After activation, go to "Settings" and select "Email" to access the WP Mail SMTP settings page.
Inputting SMTP server details
- General settings:
- From Email: Enter the email address from which your WordPress emails will be sent.
- From Name: Specify the name associated with the sender's email address.
- Mailer: Choose "SMTP" as the mailer option.
- SMTP options:
- SMTP Host: Enter the SMTP server hostname provided by your SMTP service provider (e.g., smtp.gmail.com).
- SMTP Port: Input the appropriate SMTP port (e.g., 465 for SSL, 587 for TLS).
- Encryption: Choose the encryption type required by your SMTP provider (SSL/TLS/None).
- Authentication:
- SMTP Authentication: Enable this option.
- SMTP Username: Enter your SMTP provider's username (often your email address).
- SMTP Password: Input the password associated with your SMTP provider's account.
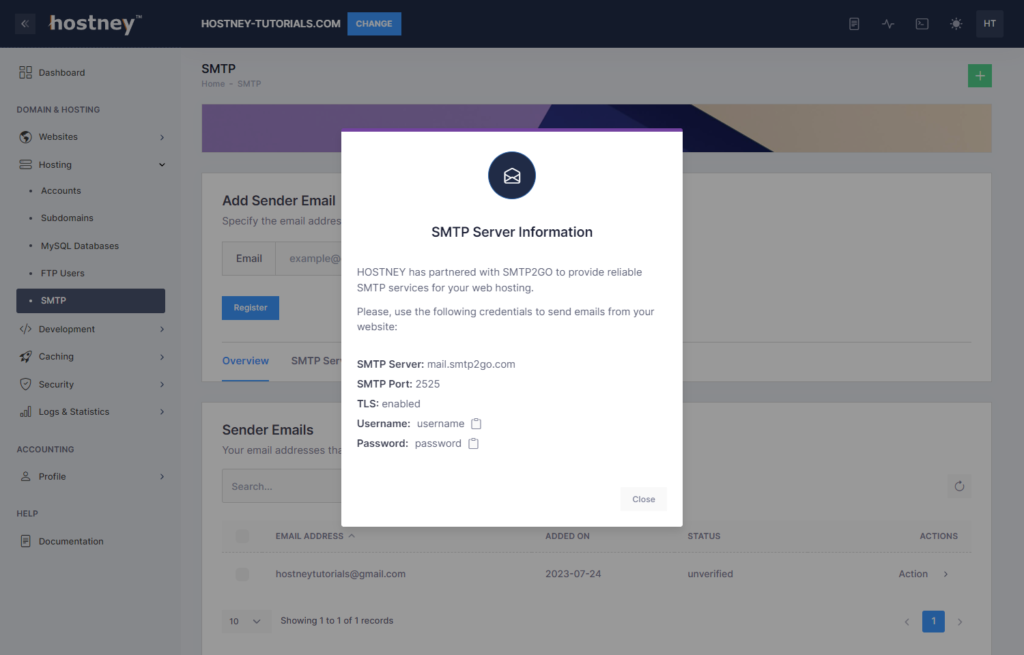
If your website is hosted by Hostney, you can find your SMTP2GO SMTP settings by going to 'Hosting' > 'SMTP' in your Hostney Control Panel. See our SMTP knowledge base for more information.
Handling advanced settings
- Advanced Email Options:
- Return Path: Set this to "On" to specify a return path for bounced emails.
- Mail Logging: Enable mail logging to keep a record of sent emails for debugging purposes.
- Test your configuration:
- Scroll down to the "Email Test" section and send a test email to verify that your SMTP configuration is working correctly.
Congratulations! You've successfully configured WordPress SMTP for your website using the WP Mail SMTP plugin.
4. Testing Your SMTP Configuration
After setting up your SMTP configuration, it's crucial to test it to ensure emails are sent correctly. Here's how to do it:
Sending a test email
- Return to the WP Mail SMTP settings page.
- In the "Email Test" section, enter your email address in the "Send To" field.
- Click the "Send Email" button.
- Check your email inbox for the test email. If you receive it, your SMTP configuration is working as expected.
Troubleshooting common issues
If you encounter issues during the test, consider these common troubleshooting steps:
- Check your credentials: Verify that you've entered the correct SMTP server details, username, and password.
- Port and encryption settings: Ensure that you've configured the correct SMTP port and encryption settings according to your SMTP provider's requirements.
- Firewall and security plugins: Some security plugins or server firewalls may block outgoing SMTP connections. Check your firewall and security plugin settings.
- Email provider settings: Ensure that your SMTP provider settings are up-to-date and haven't changed.
- Review logs: If you've enabled mail logging, review the logs for error messages or clues about the issue.
By systematically troubleshooting and addressing any problems, you can ensure that your SMTP configuration is robust and reliable.
5. Optimizing Email Deliverability
To maximize the chances of your emails being delivered to recipients' inboxes and not ending up in spam folders, it's essential to configure SPF, DKIM, and DMARC records.
The Importance of SPF, DKIM, and DMARC Records
- SPF (Sender Policy Framework): SPF records specify which mail servers are authorized to send emails on behalf of your domain. By configuring SPF records, you prevent spammers from using your domain to send malicious emails.
- DKIM (DomainKeys Identified Mail): DKIM adds a digital signature to your email headers, allowing email providers to verify that an authorized sender sent the email and hasn't been tampered with during transit.
- DMARC (Domain-based Message Authentication, Reporting, and Conformance): DMARC builds upon SPF and DKIM, providing a policy framework for email authentication. It enables you to specify how email providers should handle emails that fail SPF or DKIM checks and provides reporting on email authentication results.
Configuring SPF, DKIM, and DMARC Records
- SPF Records:
- Access your domain's DNS settings through your domain registrar or hosting provider.
- Create or modify the SPF record to include the IP addresses or hostnames of your authorized email servers. For example:
v=spf1 include:_spf.google.com include:sendgrid.net ~all
- Verify and publish the SPF record.
v=DMARC1; p=quarantine; rua=mailto:dmarc@example.com; ruf=mailto:dmarc@example.com; sp=reject
- The "p" tag determines how email providers should handle failed authentication (quarantine, reject, or none).
- The "rua" and "ruf" tags specify where DMARC reports should be sent.
By configuring these records, you enhance your email deliverability and reduce the likelihood of your emails being flagged as spam.
6. SMTP Plugin Best Practices
Ensuring the ongoing reliability and security of your SMTP configuration is crucial. Here are some best practices to follow:
Regularly updating your SMTP plugin
- Plugin Updates: Keep your SMTP plugin and WordPress core files up-to-date to benefit from the latest security patches and features.
- Compatibility: Check for plugin updates to ensure compatibility with the current version of WordPress.
Ensuring your SMTP provider settings are up-to-date
- Review SMTP Settings: Periodically review your SMTP provider settings to make sure they are accurate and align with any changes made by your provider.
- API Keys: If you're using API keys for authentication, ensure they are active and valid.
Monitoring email logs and notifications
- Mail Logs: Regularly check your SMTP plugin's email logs for any error messages or unusual activity. This can help you identify and address issues promptly.
- Notifications: Enable email notifications from your SMTP plugin to receive alerts about email delivery problems.
By adhering to these best practices, you can maintain a reliable and secure email delivery system for your WordPress website.
7. Conclusion
In this comprehensive guide, we've explored the world of WordPress SMTP plugins, from understanding their importance to choosing the right one, configuring SMTP settings, and optimizing email deliverability. We've also covered best practices for maintaining your SMTP setup.
SMTP configuration is a critical step in ensuring that your WordPress website's email communication is dependable and efficient. By following the steps outlined in this guide and staying vigilant in monitoring your email delivery system, you can provide a seamless experience for your website's users and customers.
Whether you're running a personal blog, an e-commerce site, or a corporate website, mastering SMTP is a valuable skill that contributes to the success of your online presence.
Visit WPBeginner.com for an alternative guide.
Not a customer yet? Try our services risk-free with our free 30-day trial.